Hazrul Aswad 👋
A Passionate Product Designer 🖥️ & Design Mentor that having more than 4 years of working experiences over some companies and institutions. Currently I'm diving into front-end coding ⚙️. Available for remote work!

A Passionate Product Designer 🖥️ & Design Mentor that having more than 4 years of working experiences over some companies and institutions. Currently I'm diving into front-end coding ⚙️. Available for remote work!
Project For:
My Role: Product Designer & Researcher
Team Contributor: 1 Head of Product, 1 PM, 2 Product Designers, 1 UIX Designer, 2 UATs, and 4 Devs.
Project Duration: 2-3 Months
Status: Development Success


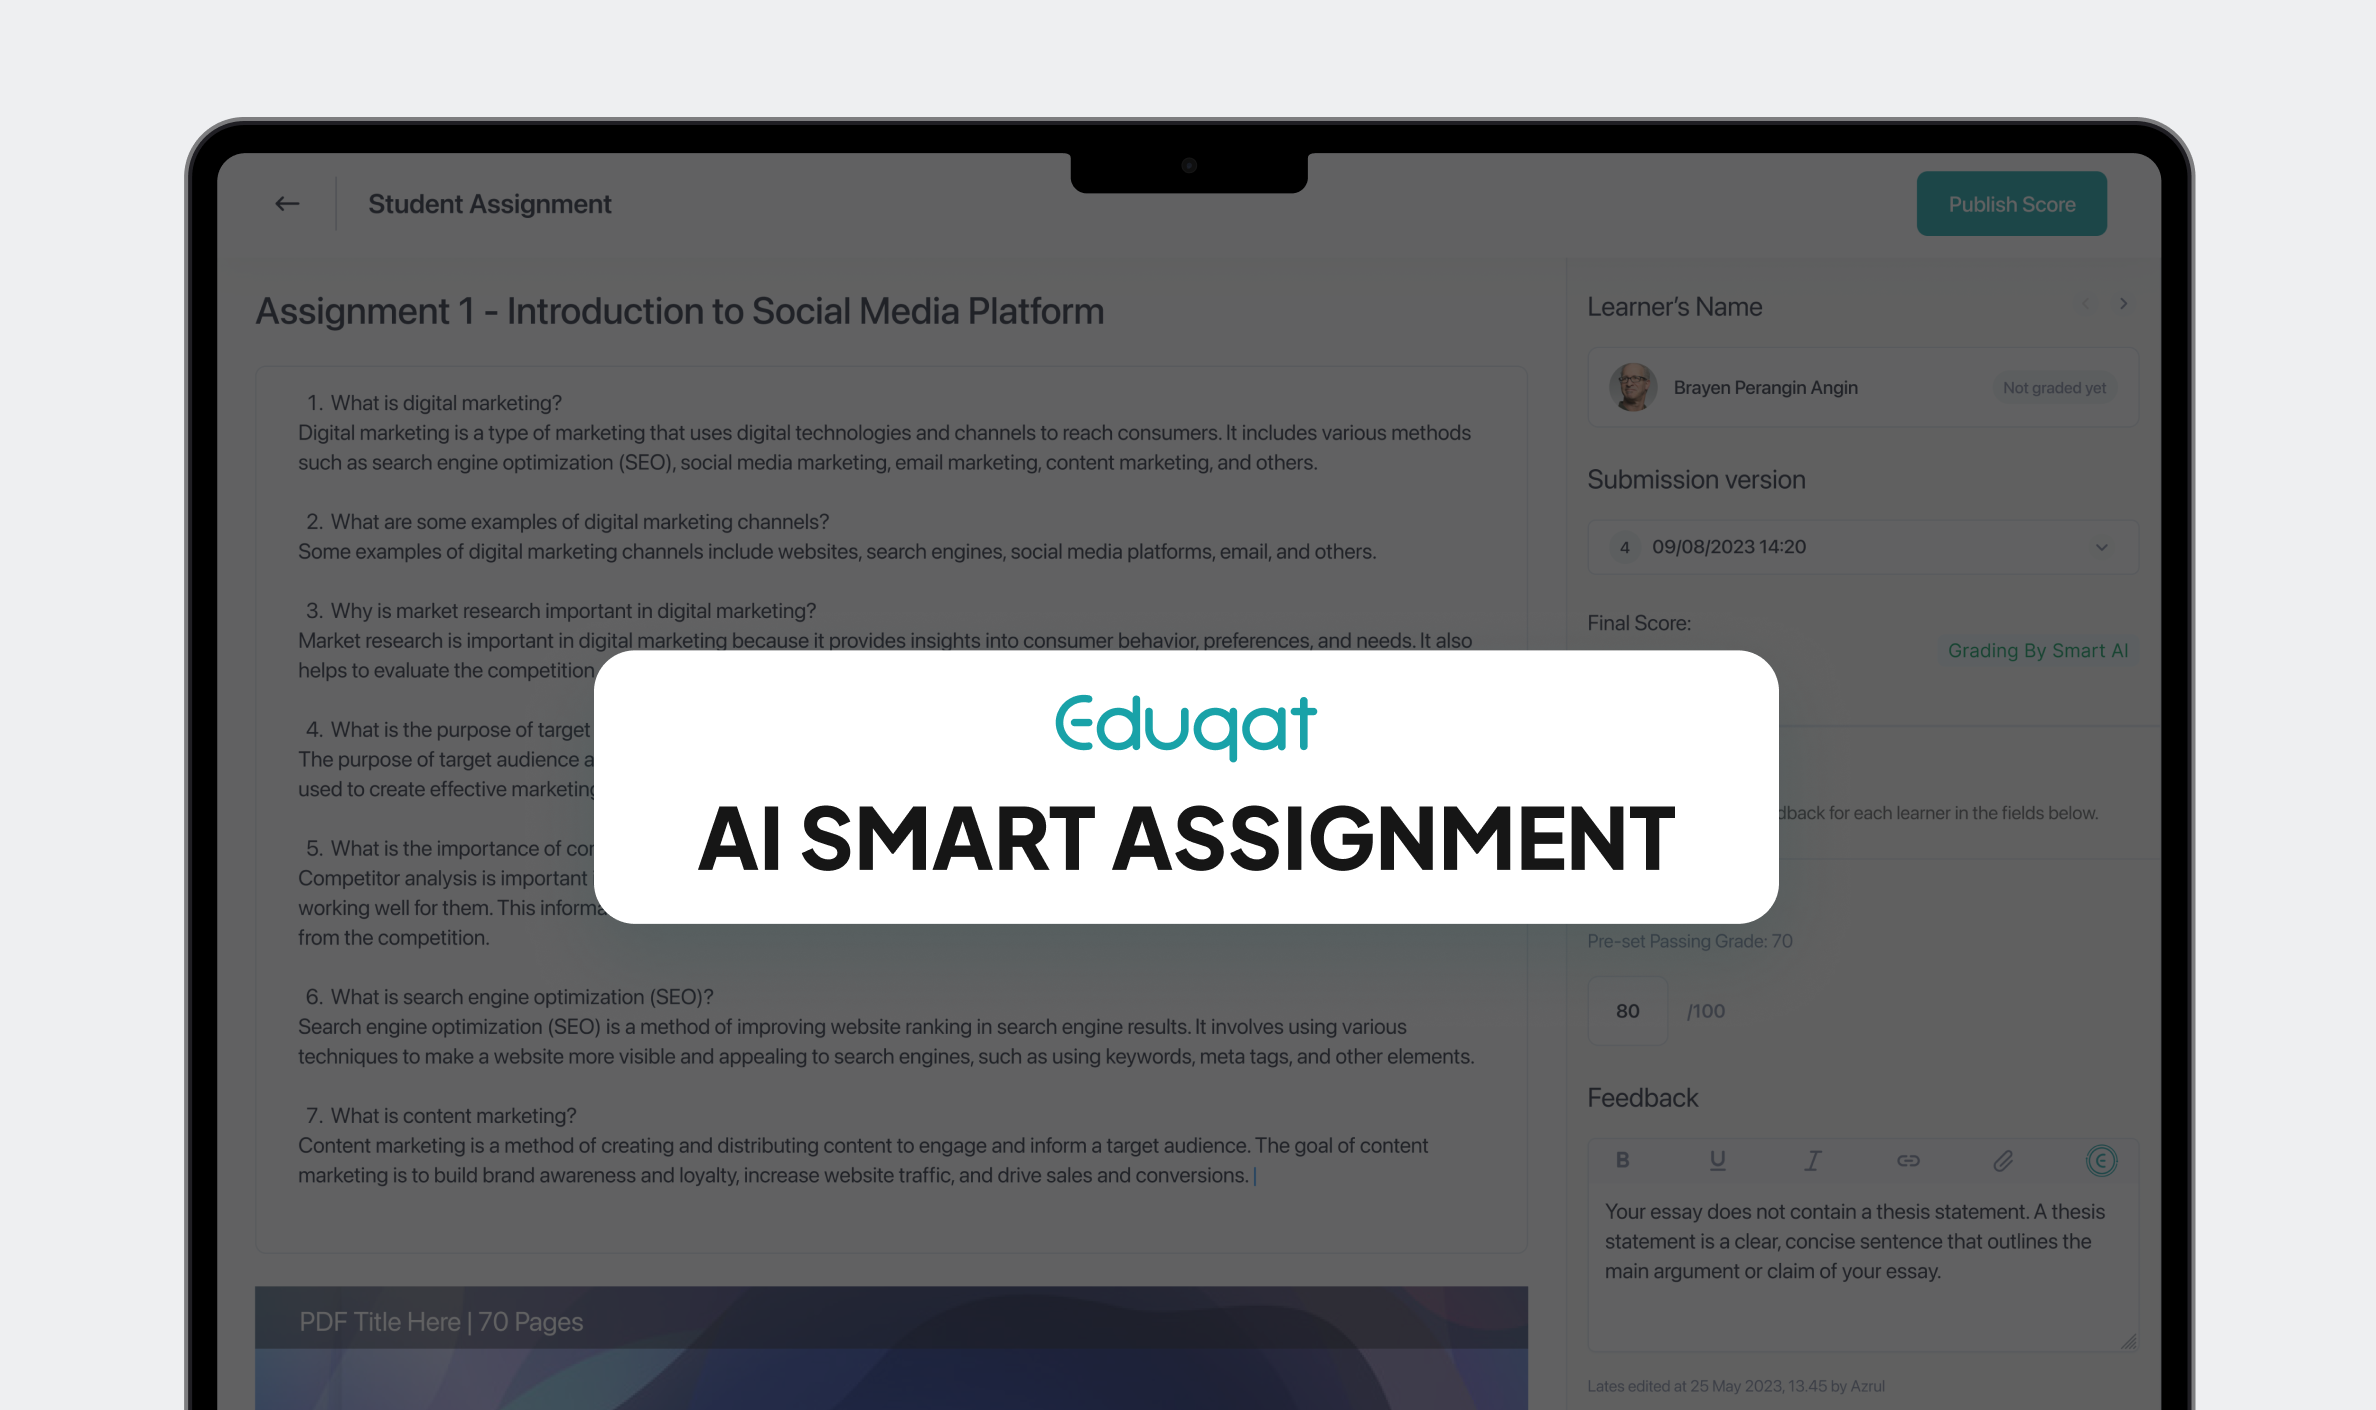
After successfully launching the AI-Driven Course Creation project, we encountered a new challenge: many clients inquired about Eduqat’s assignment feature and how it could be enhanced. This prompted us to explore the integration of AI into our Assignment system. Our goal was to simplify the process for educators—helping them create assignments more efficiently, generate grading rubrics seamlessly, and leverage AI-powered assessment to evaluate thousands of submissions instantly. By automating these aspects, we aim to reduce manual workload and enhance the overall learning experience.
Despite the growing adoption of digital learning platforms, educators and institutions still face significant challenges in managing student assignments effectively:
Educators spend substantial time structuring assignments and defining grading criteria. Many lack the tools to streamline this process, leading to inefficiencies.
Manual grading is often subjective and inconsistent, especially when multiple educators are involved. This inconsistency affects fairness and student learning outcomes.
Large-scale courses struggle with grading assignments promptly. Reviewing thousands of submissions manually is impractical, delaying feedback and hindering student progress.
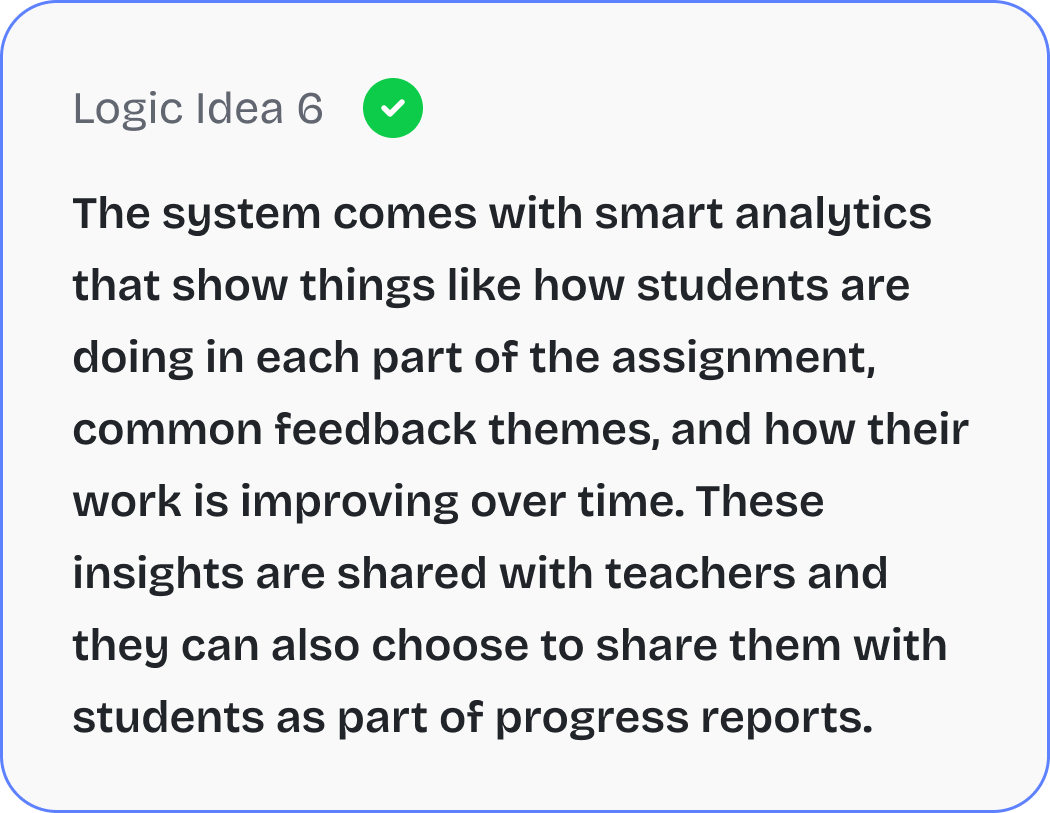
Traditional grading systems lack intelligent analytics that could provide deeper insights into student performance and learning patterns.
To address these challenges, we designed the AI-Powered Assignment System, which streamlines assignment creation, evaluation, and feedback with intelligent automation:
Educators can quickly generate well-structured assignments and grading rubrics with AI assistance, reducing the time spent on manual creation.
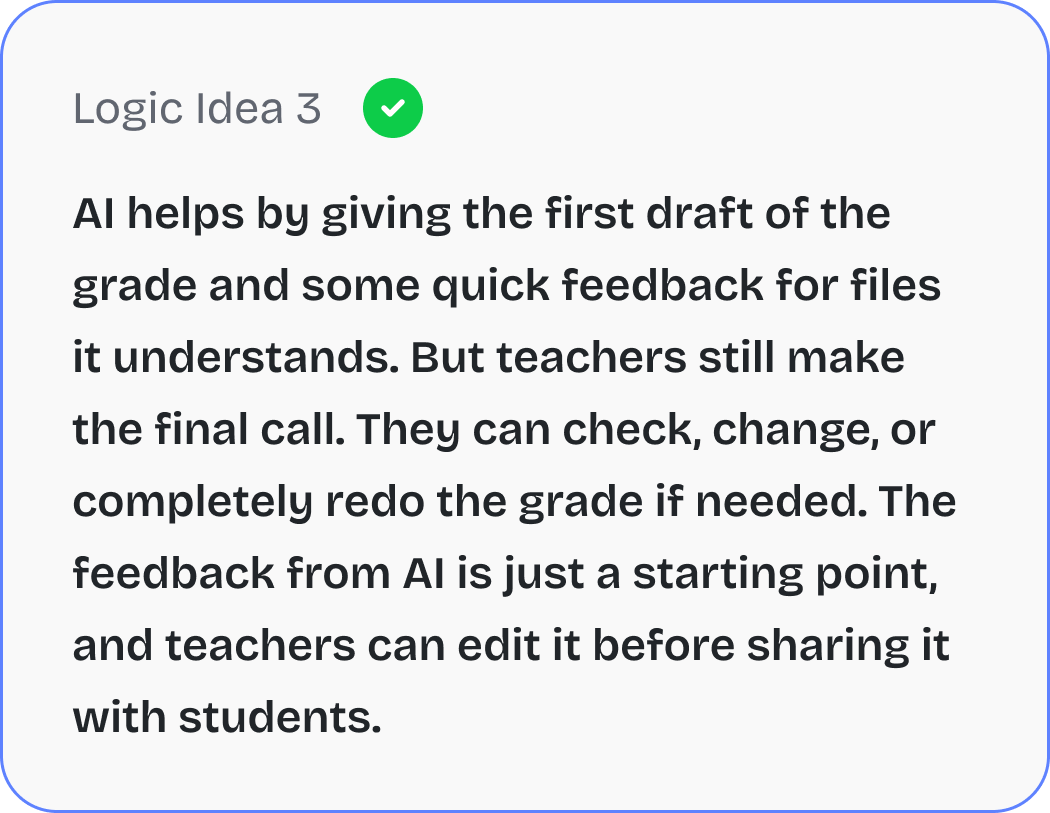
The system can evaluate thousands of submissions in real time, providing objective, consistent, and transparent grading based on predefined rubrics.
AI not only grades assignments but also offers personalized feedback, helping students understand their strengths and areas for improvement.AI not only grades assignments but also offers personalized feedback, helping students understand their strengths and areas for improvement.
The goal of this project is to empower educators and institutions by streamlining the assignment creation, evaluation, and feedback process through AI-driven automation. By integrating intelligent grading, rubric generation, and personalized feedback, the system reduces manual workload while ensuring accuracy, consistency, and scalability.
With an intuitive user interface and smart automation tools, educators can effortlessly design assignments, generate structured grading criteria, and assess thousands of submissions in real-time. This not only enhances efficiency but also improves learning outcomes by providing students with instant, data-driven feedback. Ultimately, the AI-Powered Assignment System enables a more effective, fair, and engaging assessment experience for both educators and learners.
As a Product Designer, I played a key role in shaping the AI Smart Assignment System, covering both UX and UI design aspects. I began by conducting in-depth research on AI integration in assignment workflows, exploring its feasibility, opportunities, and limitations within edtech. This involved understanding AI’s role in automated grading, rubric generation, and personalized feedback, while also identifying potential challenges such as bias in AI assessments, scalability issues, and regulatory considerations.
To ensure alignment with user needs, I synthesized insights from multiple stakeholder meetings with Eduqat’s C-level team, gathering direct feedback from clients on their frustrations and expectations. From these discussions, I identified critical pain points, mapped AI workflows based on stakeholder assumptions, and refined the solution to ensure both technical viability and educator usability.
Competitor benchmarking was another key part of my role, where I analyzed how leading edtech platforms implemented AI-driven assignment tools. This research helped uncover industry best practices, feature logic, and usability gaps that informed our design strategy.
With these insights, I developed user flows, wireframes, and initial UI designs, ensuring a seamless experience for educators. My work laid the foundation for the AI-powered assignment creation, grading automation, and scalable feedback system, before the final UI refinements were handed off to the dedicated UI Designer.
When we started working on the AI Assignment feature, the idea didn’t come out of nowhere. It was actually a response to real problems voiced by our end-users and teachers who were struggling with the time-consuming process of grading hundreds of assignments, and students who needed faster, more meaningful feedback.
Our CEO had spent a good amount of time listening to the users and understanding their pain points. These insights were then brought into an internal leadership meeting, where the CEO presented the key needs to our Head of Product, Senior Product Consultant, Tech Lead, and Product Manager.
From this meeting, we didn’t just walk away with a list of feature requests. We came back with a strong mission:

Once the direction was clear at the leadership level, the next step was for the Head of Product and our Senior Product Consultant to bring the idea to our internal product design team where I joined as the Product Designer (UX Designer), along with the UI Designer and UX Writer.
Here’s how I broke down the process with the team:
The first step I was thinking about "what would the teacher’s journey look like? What kind of controls did they need? Where does AI fit in without taking away their authority?". After that, I am going to conduct benhmarking, create the Focus Map, Pathways & Decisions, and Low-Fi Blueprints.
After defining a unchartered concepts, the UI Designer will translate that the experience concept into aesthetic ans accessible interface by refinning the Low-Fi Blueprints (wireframe) that offered by Product Designer (UX Designer).
While collaborating, our UX Writer is going through all copy writings and make them stay focused to the user. After the process is done, we're gonna do an internal meeting with Head of Product and Product Consultant to restructure the concepts well before doing presentation to CEO.
These what we are gonna do when collaborating accross product team. Next step, I'm gonna explain the whole process that I have done in building AI Smart Assignment.

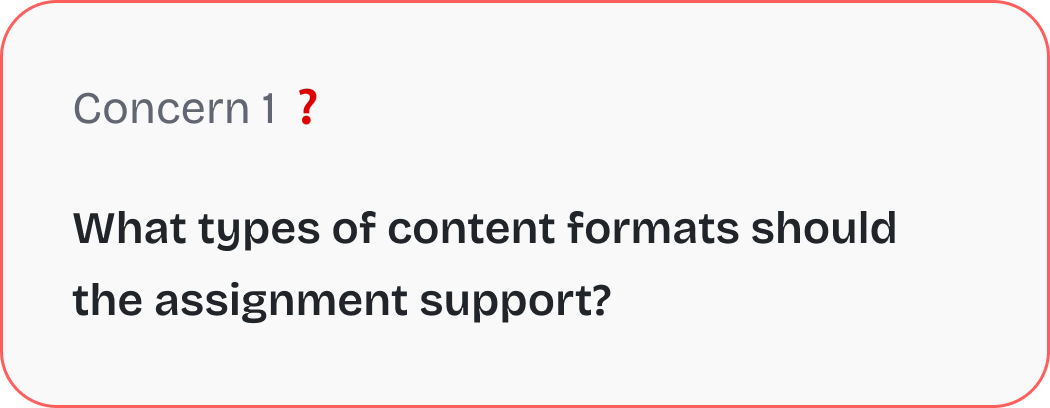
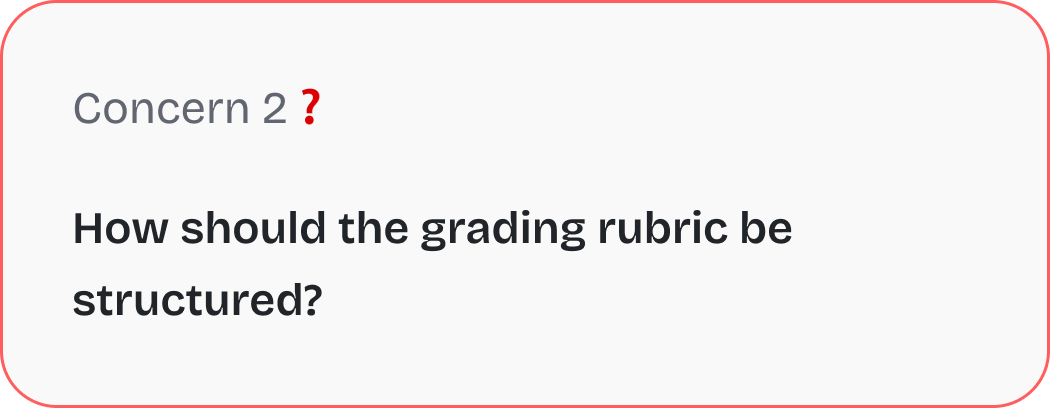
After multiple discussions with stakeholders about the logic behind AI Smart Assignment, my team and I uncovered a key insight about AI Smart Assignment that the true challenge isn’t just about automation, but at its core, this feature is about helping educators spend less time creating assignments and making grading at scale more efficient and insightful. However, as we explored further, we discovered that the problem space was much broader than anticipated many aspects remained undefined, and the expected output needed clearer mapping to truly address these challenges. As a product designer, I found myself asking:
In trying to break down the problem, several concerns surfaced:
This process of understanding how AI can help with assignments has been both challenging and exciting. As I design the interface, my main goal is to make sure educators feel supported, not replaced. AI isn’t just about automation, it’s about enhancing the learning experience in a way that keeps the human touch at the center.
To build a competitive and innovative course creation platform, I conducted a competitor benchmarking analysis on the following platforms: Thinkific, Kajabi, Teachable, Mini Course Generator, and Learnworld. The goal was to compare key features and identify opportunities where Eduqat can stand out.
For the competitor benchmarking, I analyzed five key aspects to gain insights into how Eduqat can stand out in the market. These included total active users to understand the market reach and adoption of each platform, Pro plan pricing to compare subscription costs and position Eduqat competitively, AI course creation to evaluate how AI is being used to streamline the course development process, AI assignment or assessment to check if AI is being utilized for automating student evaluations and giving a feedback, and also AI quiz creation to analyze how AI is assisting in generating quizzes and interactive content. This comprehensive analysis provided valuable insights to guide Eduqat’s feature development and competitive strategy.
In this screenshot, I explored how Google Classroom structures its assignment submission interface, which helped me analyze the platform’s current UX decisions and identify improvement opportunities for Eduqat's AI-based assignment system.
Let's break it down into key components:

Google Classroom uses a persistent sidebar for navigation across different classes, assignments, and settings. It helps educators and students switch context quickly, but it doesn’t provide deep access to assignment-level tools or filters.
👉 Insight: This could be enhanced with smart filters, or shortcuts to ongoing grading tasks.
This is the main content area that shows the full instructions of the assignment — including title, due date, grading score, and submission requirements. It’s straightforward, but quite static.
👉 Insight: There’s room to improve interactivity here, such as by surfacing rubrics, embedding examples, or previewing attached content in-line.
While it’s functional, the UI doesn’t offer tools for grading, rubric selection, or inline feedback, which forces educators to navigate elsewhere for those actions.
👉 Insight: This is where an AI-assisted grading panel or “Grading Sidebar” (as we're planning for Eduqat) could provide real value by allowing educators to review, grade, and give feedback without switching pages.
The next screenshot highlights how Google Classroom handles the grading workflow when educators review individual student submissions. It brings attention to the experience from an evaluator’s perspective — especially when managing multiple assignments at once.
Let me walk you through the key UI components:

This section allows teachers to jump between student submissions using simple “next” and “previous” arrows. While functional, it lacks visibility into the overall class progress or a list view to quickly identify which students still need grading.
💡 Opprtunity: We can expand this into a Smart Navigator with a dropdown or pop-up list view showing grading status for all students.
This is where the submitted file (from Google Drive) is displayed. In this example, the file was not found a realistic error case that highlights a limitation such as There’s no fallback or alternative way to engage with the student or flag the error directly from this screen.
💡 Opprtunity: A more resilient UI could include error resolution options like: "Request Resubmission", "Send Message", or an AI-suggested solution.
This panel is where educators can view the file submission timestamp, click “View History” to see prior attempts, input a grade, and write a feedback. While compact, it lacks depth. There’s no grading rubric, no inline commenting, and no AI-driven suggestions for feedback.
💡 Opprtunity: This panel could evolve into an AI-Powered Grading Assistant such as Rubric-based Evaluation, Feedback Templates, and Submission History Analytics.
By analyzing how Google Classroom presents assignment-related information, I identified gaps we could address in our own product. For example:
These insights helped shape our early UX direction for AI Smart Assignment, especially around making grading easier, smarter, and more human-friendly.
As part of designing our Smart Assignment feature, I spent time comparing how other platforms handle assignments—especially Google Classroom and LearnWorlds. The goal wasn’t just to see what buttons they had, but to really understand the experience behind how educators assign, review, and grade student work. So, here I'll explain what I've got from LearnWorlds during exploring in to their web:
LearnWorlds brings something pretty special to the table. AI is not just a buzzword, it’s actually integrated into how teachers work. For example, when a teacher is reviewing student work, LearnWorlds gives them the option to use AI to write feedback. But it’s not generic or robotic, it lets you choose the tone, focus, and even how detailed the feedback should be. It's like having a smart assistant that helps you sound thoughtful but saves you time.
They also let you create entire assessments using AI, so instead of spending hours drafting quizzes or forms, you can start with an AI-generated version and tweak it from there. That’s a huge win for saving time without sacrificing quality. And when it comes to grading, you can mix and match such as auto-grade for simple questions (like multiple choice), and manually review open-ended responses. You also get clear reports with performance insights what students got right, what they missed, and how they’re doing over time.
Google Classroom is great at the basics. It’s clean, easy to use, and integrates smoothly with Docs, Drive, and Gmail. But when we talk about advanced grading workflows or personalized AI support, it’s pretty limited. It doesn’t help generate rubrics or assessments, and there’s no AI feedback support. All grading is done manually, and feedback has to be written one by one. This can get overwhelming when you’re handling a large class or tight deadlines.
From looking at both platforms, here’s what I took away:
LearnWorlds does this well, and it’s a principle we’re also applying AI helps, but teachers stay in control.
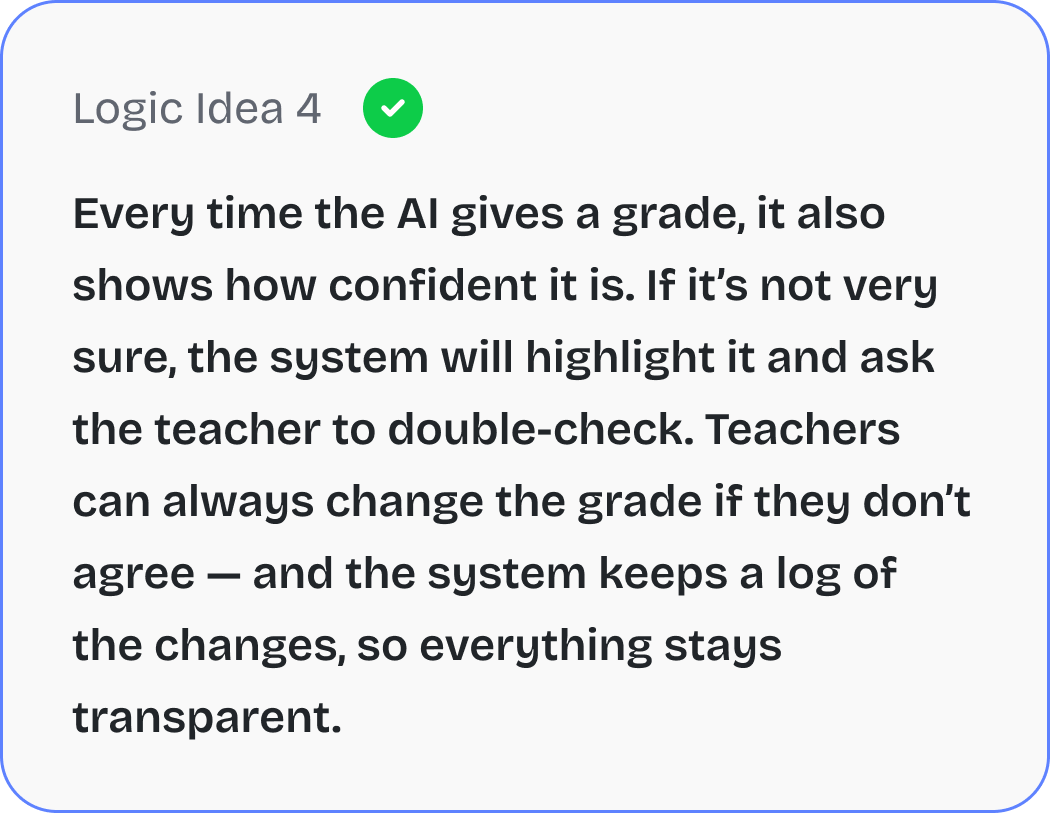
Teachers need to know how grades were created especially if AI is involved. So features like “AI Confidence Level” and manual override are important for trust.
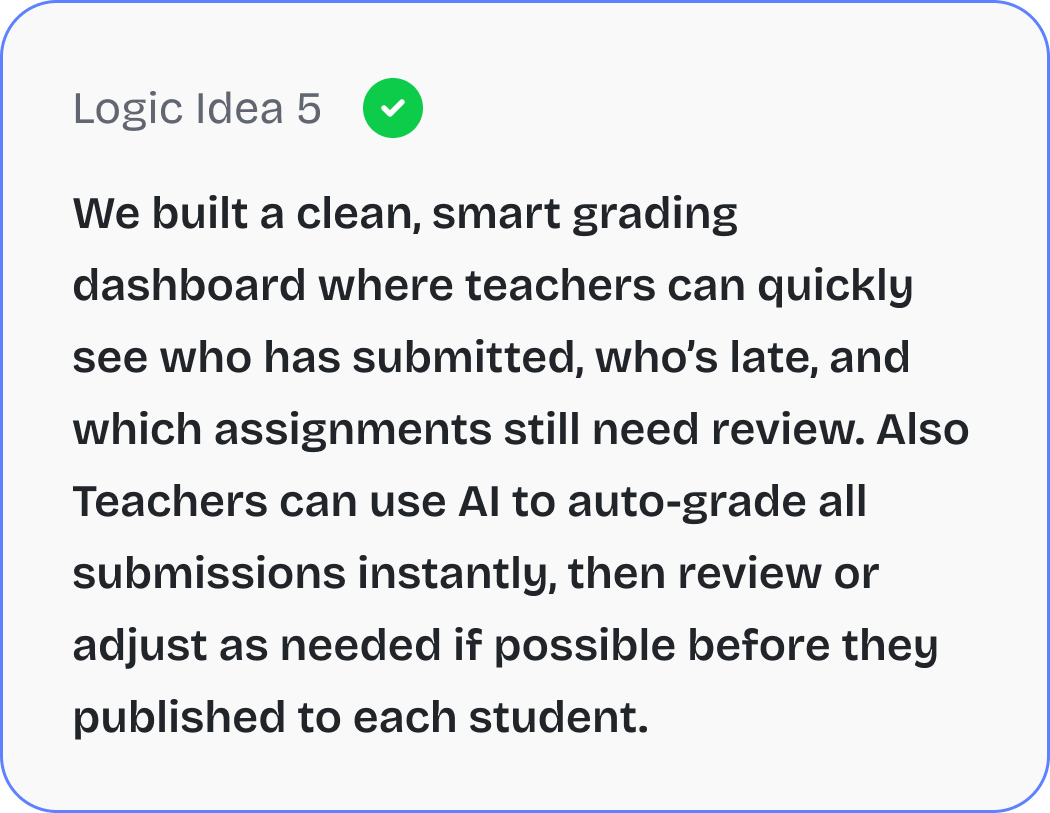
If a teacher is grading hundreds of submissions, they shouldn’t feel overwhelmed. Smart dashboards, filters, and quick navigation (like keyboard shortcuts or student jump menus) are key.
In the end, LearnWorlds gave us a strong signal of where things are headed. And by mixing that inspiration with the simplicity and collaborative strength of Google Classroom, we’re shaping something we believe will feel intuitive, powerful, and genuinely helpful for educators especially when dealing with large scale assignment workflows.
Before jumping into new features, we took a step back and asked ourselves:
That’s a reason where our business goals come in. They’re not just about adding cool things with AI, but making sure every part of the assignment experience actually helps teachers and students in meaningful ways. So here’s what we’re aiming for with Eduqat:


constraints: For MPV AI-driven course creation v1, Eduqat only focus on rich-text contents but just drop on title. So if user want to get the content details inside of that material, they can generate manually using AI rich-text tool.
Before jumping into high-fidelity screens, I believe it’s important to slow down and shape the experience with intention. In this phase, I map out priorities, user paths, and structural ideas that will eventually guide the design direction. This is where raw ideas turn into structured decisions — through prioritization, flows, blueprints, and component-level thinking. Below is how I translated those thoughts into actionable design artifacts.
Before building new features, I and my team needed a clear view of what to focus on first. So, we used the Eisenhower Matrix to help me sort ideas based on urgency and impact. This way, we could make sure we were solving the right problems without wasting time or energy. It gave me a simple way to prioritize what really matters and what can wait.


In this stage, I was responsible for designing the complete user flow based on the previously defined focus map. The main objective was to ensure a smooth and intuitive experience for educators, aligning each step with the actual goals of the AI Assignment feature. Throughout this process, I collaborated closely with the Head of Product and Product Consultant to validate and refine the flow based on user needs and product requirements.
Below are the key user flows I designed and how each flow solves specific user problems:
The journey begins when a vendor creates a syllabus via the Curriculum Dashboard and selects the "Assignment" material. Within the assignment detail page, there are two key components: creating a new assignment and setting up the grading rubric. In this case, the vendor chooses to create a new assignment.
When the user clicks "Add New", a modal appears asking whether they want to start from scratch or generate content using AI. If the user selects AI generation, they’re prompted to fill out the following parameter such as: Reference material, Tone of language, Difficulty level, Assignment type (short answer or essay), Additional instructions for AI (optional).
After completing the form, AI generates the assignment content. Once finalized, the user is redirected back to the assignment material page where they can continue editing or proceed to grading setup.

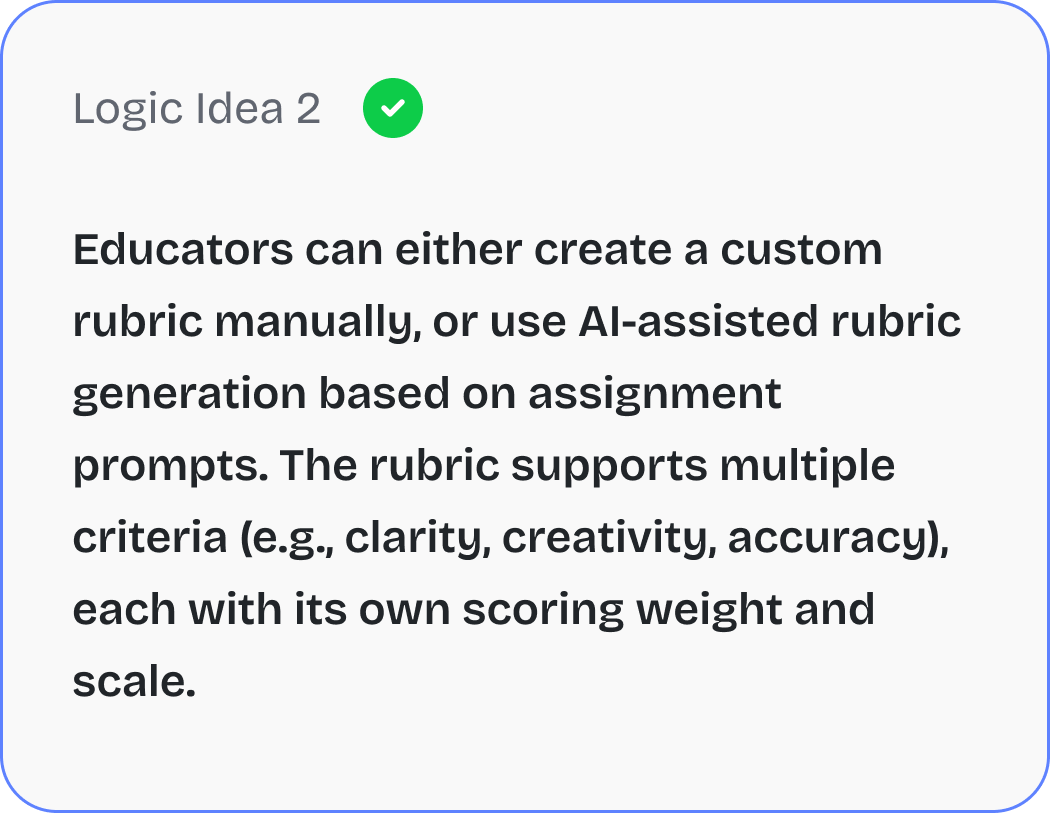
Still on the assignment material page, users can also add a new grading rubric. When they choose to use AI assistance, a similar form appears asking for: Rubric title, Reference assignment, Number of grading criteria, Additional prompt (optional)
AI will then generate rubric content automatically. After reviewing, the user can save it and return to the main material page. At this stage, users also have the option to enable Auto Grading and configure Feedback Settings for later automation during the grading process.

To view and grade student submissions, the user navigates to the Assignment menu under the Product section. This takes them to the Assignment Library, which lists all courses with available assignments.
Clicking on a course reveals its assignment list. From there, the user selects a specific assignment and then chooses a student to review their submission. If Auto Grading & Feedback is enabled, the AI will automatically fill in the score and feedback based on the preset rubric and student answers.
However, before publishing the result, the system still requires the educator to review and validate the AI-generated grading via a pop-up confirmation. This helps maintain accuracy and gives educators the final say before returning feedback to the student.

This flow illustrates how every decision point is designed to guide users through completing their tasks smoothly, while still giving them full control when it matters. It ensures educators can focus on what really matters in quality teaching and assessment while the system handles repetitive tasks efficiently.
At Eduqat, the way we do wireframing is a bit different from most companies. Instead of starting with rough sketches or low-fidelity wireframes, we jump straight into building wireframes using our existing design system components. This makes our wireframes look almost like the final high-fidelity design, even though they’re still in the early stages.
Instead of a traditional blank canvas, our AI Course Creation begins with a structured modal window. This pop-up acts as the starting point where educators define the course format—either from scratch or using AI assistance—making the process faster and more intuitive.

Instead of a traditional blank canvas, our AI Course Creation begins with a structured modal window. This pop-up acts as the starting point where educators define the course format—either from scratch or using AI assistance—making the process faster and more intuitive.

After shaping the user flow and sketching out wireframes, this phase brings everything to life. This is where I move from planning to crafting, turning structure into fully visualized UI design. In this section I walk through each part of the interface in detail, showcasing key screens that reflect how users interact with AI Assignment features. To enrich the story I also include a short video preview that highlights the AI capabilities already developed by Eduqat. This phase is not just about visuals but about how every design decision supports real tasks, goals, and user needs.
Note: This video was uploaded on August 26, 2024. As of now, Eduqat has been updated with more visual aesthetics. Let's Join Eduqat!
Before we started redesigning, the AI Assignment feature was already up and running. It was functional in its core purpose, but lacked clarity and structure for more complex tasks. The interface felt generic and didn’t fully support the workflows educators needed. Still, it gave us a valuable foundation. By learning from what existed, we discovered clear areas where the experience could be improved both in usability and design.
lorem ipsum isi konten disini

lorem ipsum isi konten disini

In this stage, I walk through the complete UI design that has been developed based on real user needs and product goals. The screens are organized into clear sections that cover the entire user journey from creating AI-generated assignments and building grading rubrics, to managing the assignment grading dashboard. Each interface is thoughtfully designed to help educators move effortlessly from planning to execution, making every interaction purposeful and intuitive.
In this first step, I am creating a new assignment. This is the screen where an educator or content creator sets up and organizes the curriculum and syllabus. In this case, I want to add a new assignment by going to the curriculum builder, managing the section, choosing "exam," and then selecting "assignment material."

After selecting the assignment material, I move to the Assignment Details and Settings page. Here, I can start building the assignment content and adjust the settings I need, like enabling AI grading and feedback. There are three main parts I focus on here: Adding or selecting a lesson title and assignment, Selecting or creating a grading rubric, and Configuring the assignment settings.

In this case, I want to reuse an assignment that I have already made. So, I click the "Select from Library" button to pick one from the library.

When I click "Select from Library," a pop-up appears showing a list of available assignments. I can use the search bar to find a specific one, but here, I can only select one assignment at a time.

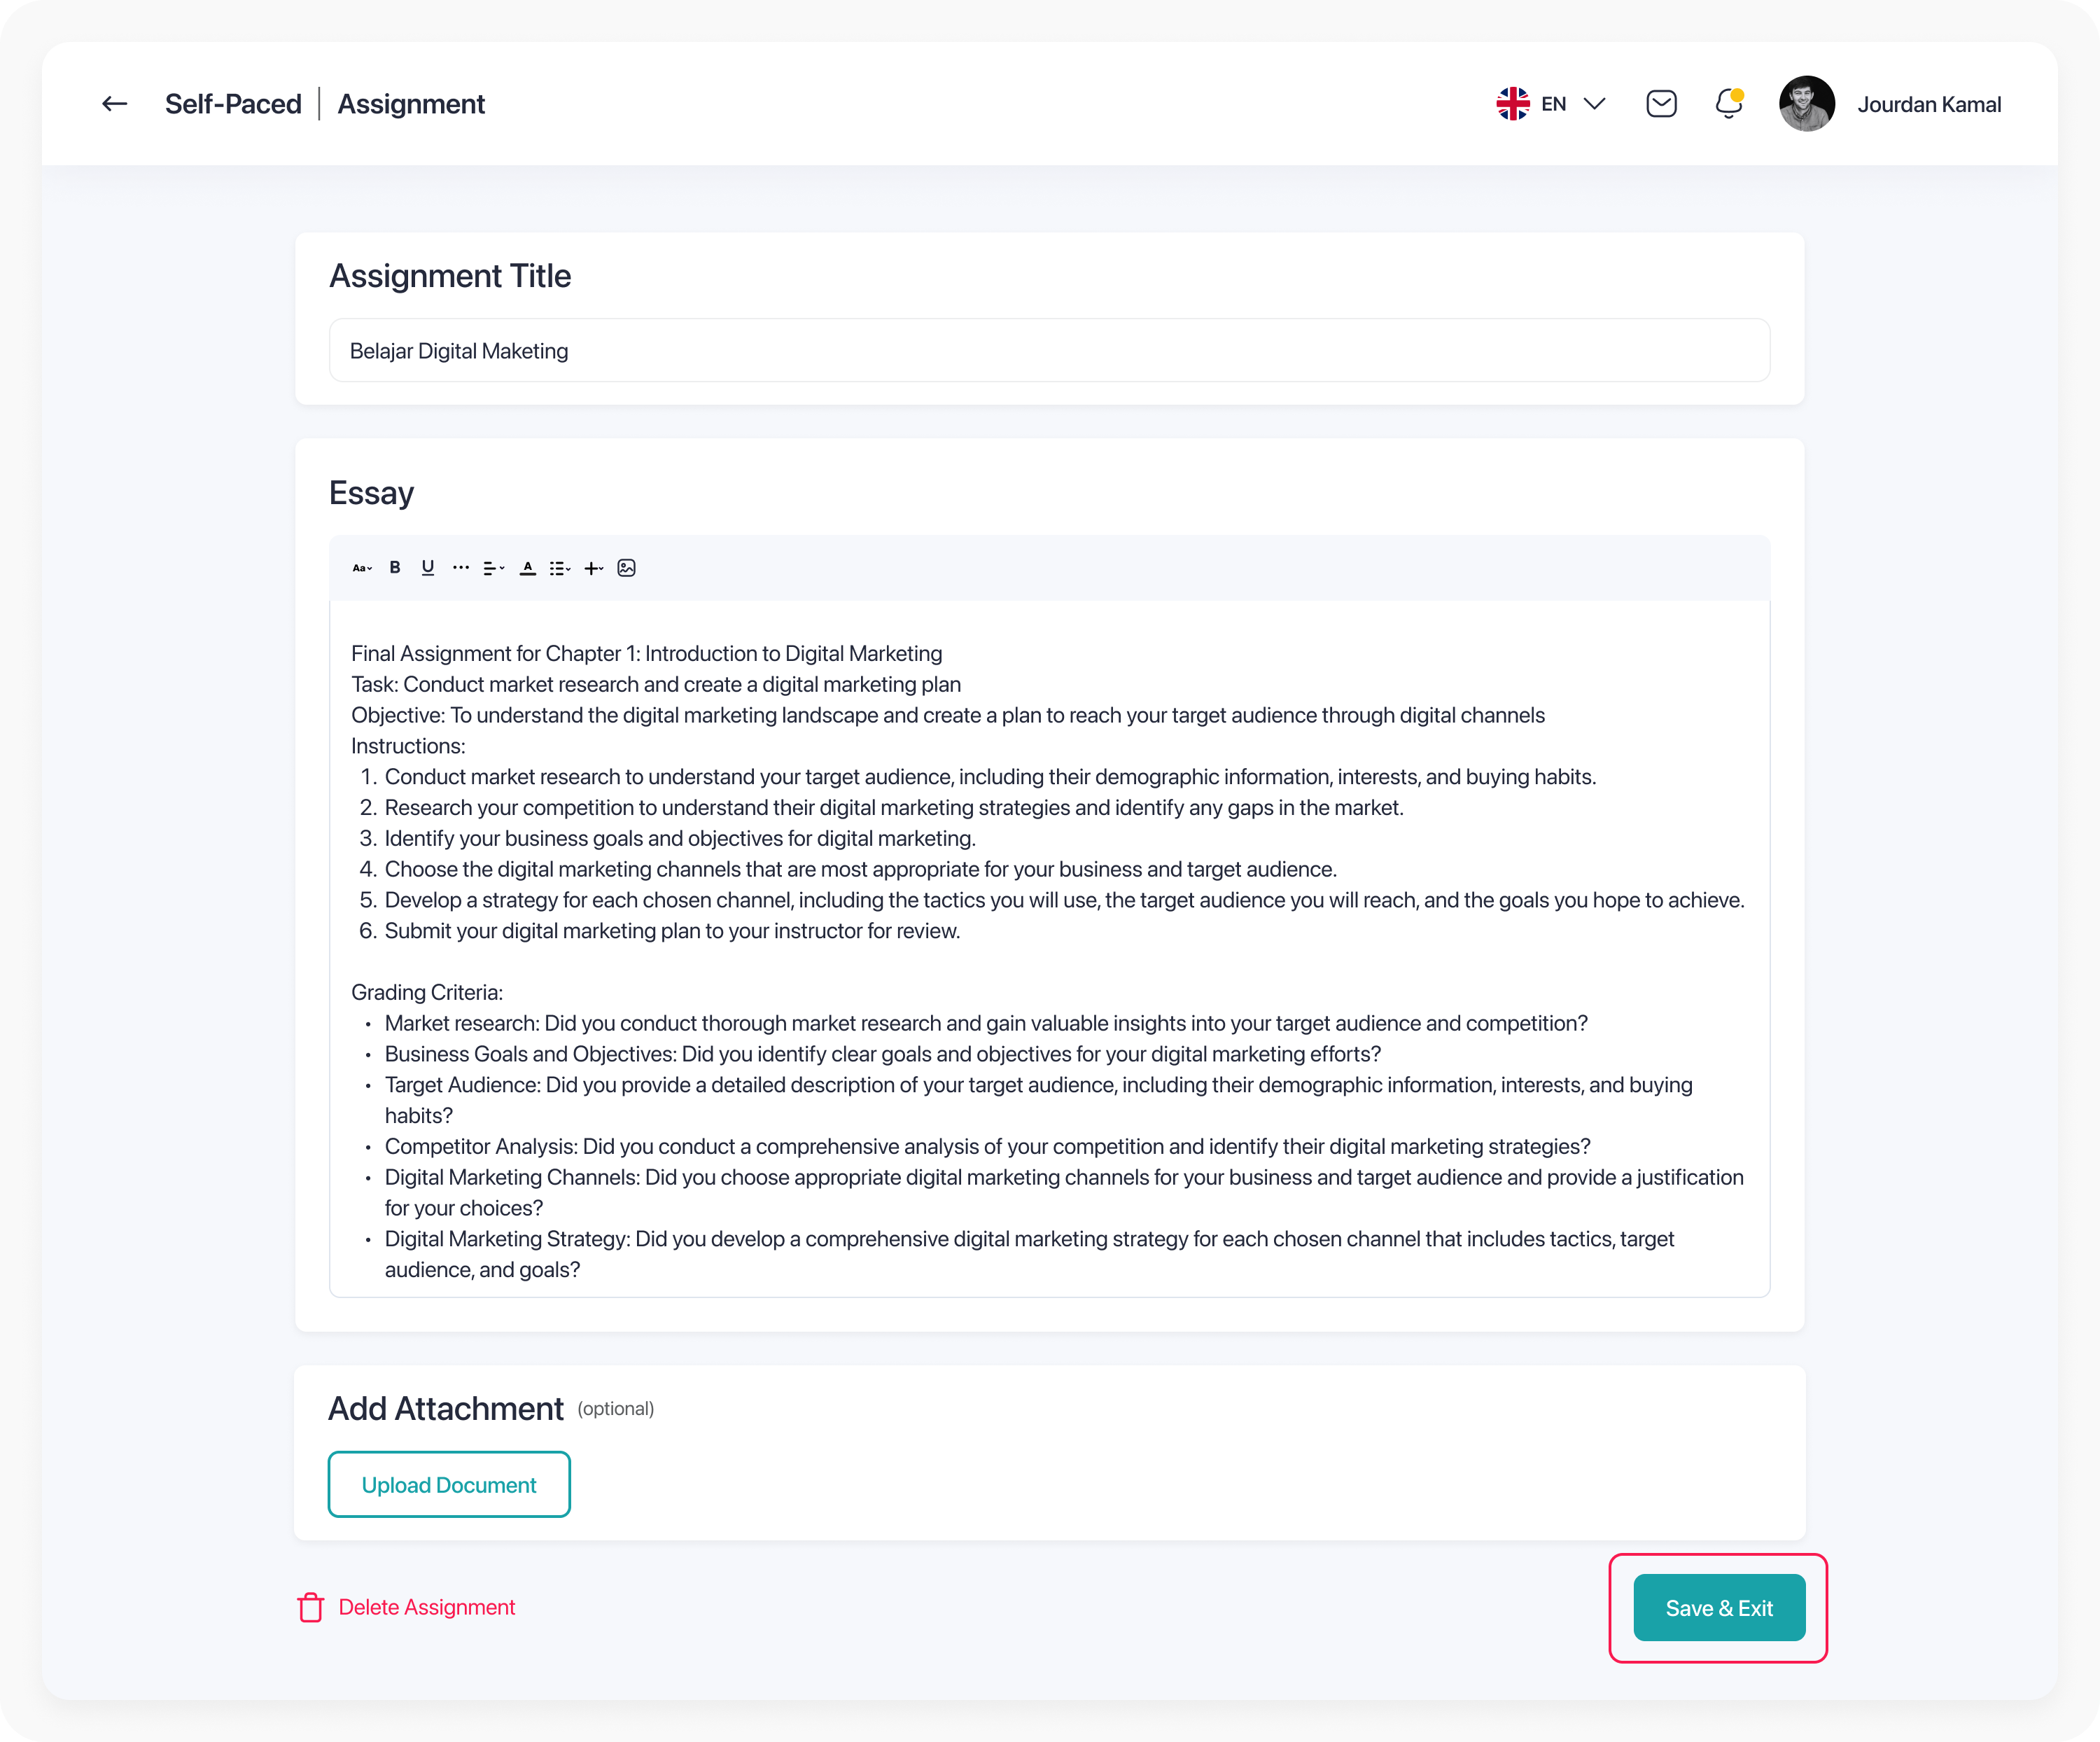
Now let’s move to creating a brand new assignment. When I click "Create New Assignment," a pop-up appears explaining the two ways I can build the assignment. So, I can either: Start from scratch ("Start from Blank"), or Use Smart AI to help generate it ("Generate with Smart AI"). Let’s say I decide to use AI to speed things up!

After choosing "Generate with Smart AI," another pop-up appears with several input forms. Here, I can give the AI some guidance by: Selecting reference materials that the AI can use, Choosing a tone of voice, Picking the difficulty level, and Adding any extra instructions in a free text box

Once I fill out all the prompts, I hit the "Next" button. Then, the AI works its magic and generates assignment content for me. This is an example of what the AI will create, and next step I can also manually add attachments if needed to make the assignment more complete. When everything looks good, I simply "Save and Exit". After that the assignment will be ready to use and saved automatically in the Assignment Library for future use.
After saving and exiting, I am brought back to the Assignment Details and Settings page. From here, I can continue setting up any other requirements like adding a "Grading Rubric" to complete the assignment setup.
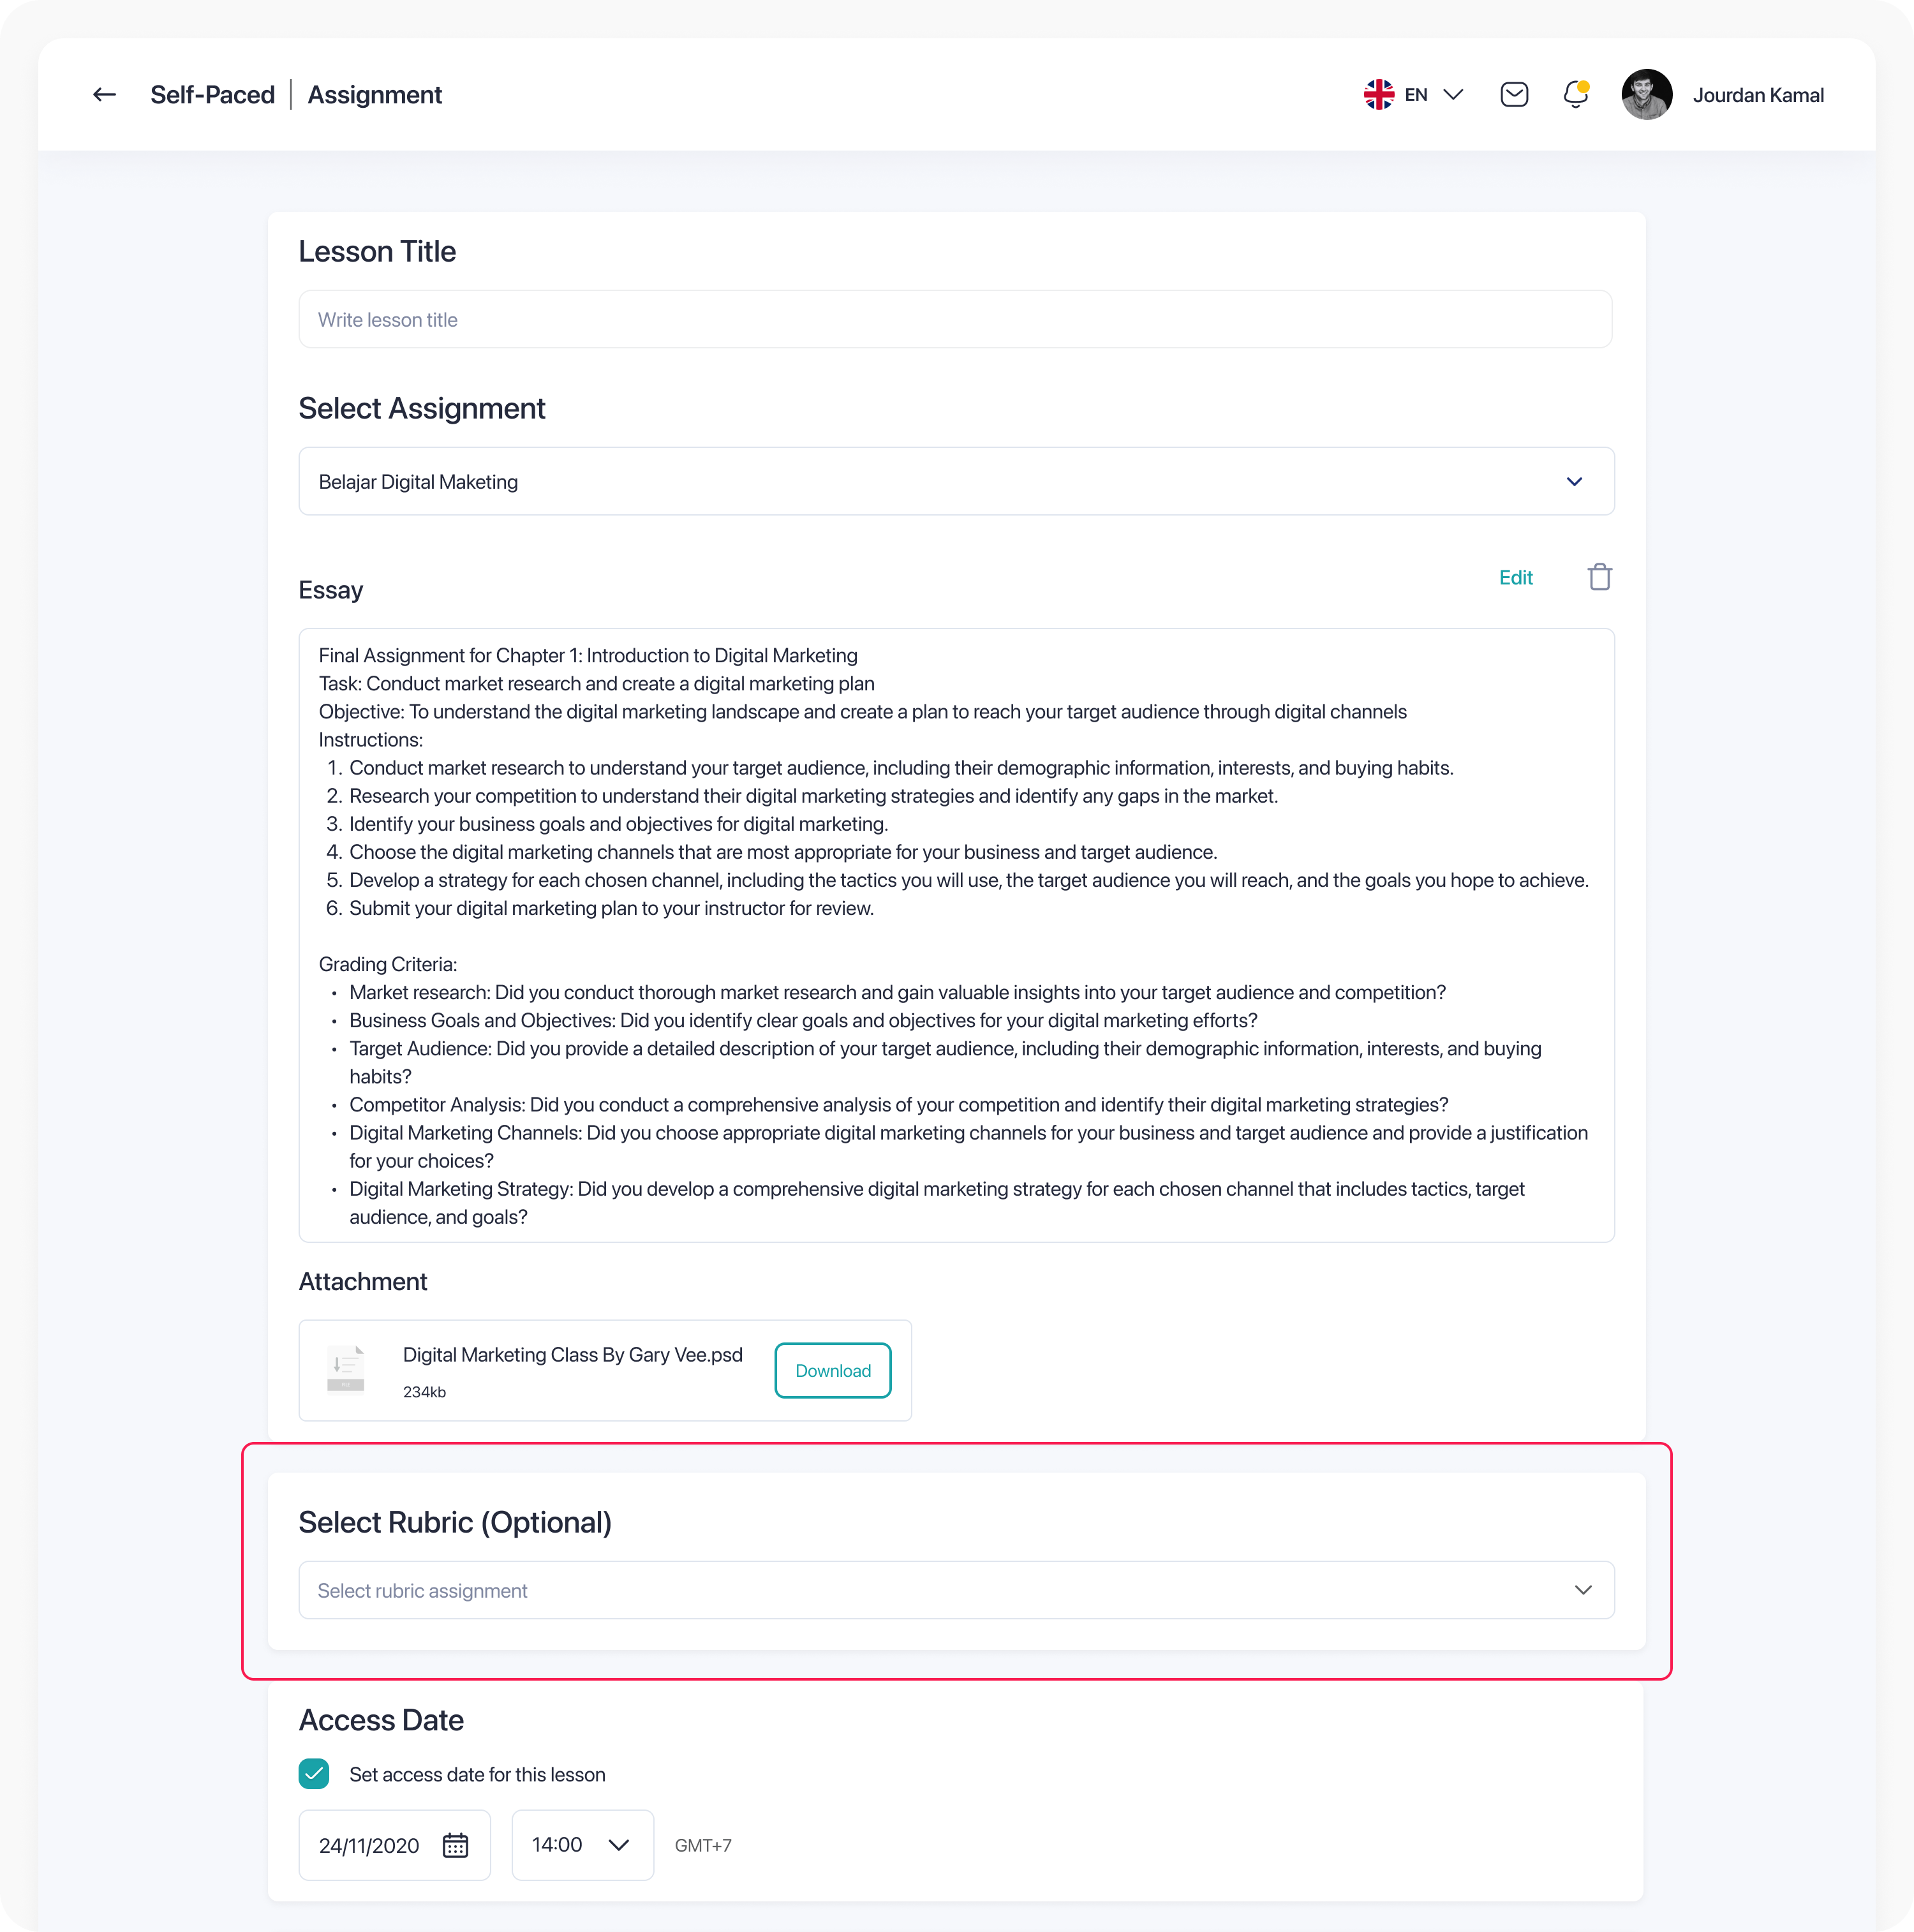
Now we are moving to the second part, which is creating the grading rubric. Here, I needed to build a new rubric to help with the assignment grading. Educators (e.g me & you) actually have the option to pick a rubric that was made before, but for this case, I started a new one. So, I clicked the "Create New" button from the dropdown to begin.

When I clicked "Create New Rubric," a pop up appeared showing two options: "Start From Blank" or "Generate with Smart AI". For this project, I chose to generate the rubric using AI.

Just like when creating an assignment with AI, a pop up appeared asking me to fill out some details for the AI to work with. I needed to enter things like the Rubric Name, select an assignment reference from the library to guide the AI, choose how many criteria I wanted for the rubric, and add any extra notes if needed. After filling everything out, I clicked "Next" to let the AI generate the rubric.

Here is the page showing the rubric content created by AI. Even though the AI helped generate it, I could still edit the content manually. I could also add new criteria or adjust the percentage weight for each rubric point to match what I needed.

Once the rubric is ready, I save it and it is automatically stored in the rubric library. After saving, I return to the Assignment Details and Settings page where I can continue setting up other important configurations, including enabling AI features to assist with grading and giving feedback automatically

Now we’ve reached the final section: the Assignment Grading Dashboard. In this part, we’ll see the Assignment Library, where all the courses that have assignments are listed. Not only that, later you’ll also see the grading dashboard for assignments and a course player showing how students submit their assignments.
In the first screenshot, you can see the Assignment Library. Here, you’ll find a list of courses, the type of each course, the total number of assignments, creation dates, educator names, and a "View" button to open the details of each course's assignments.

Next screenshot, when I click the "View Detail" button from the Assignment Library, I’m taken to the assignment list page. Here, I can see a bunch of information like the assignment name, total student submissions, how many courses are using that assignment, the creator’s name, date created, and several action buttons such as View, Edit, Duplicate, and Delete. For this case, I’m clicking “View Details” to go into the assignment submission list for the assignment I picked.

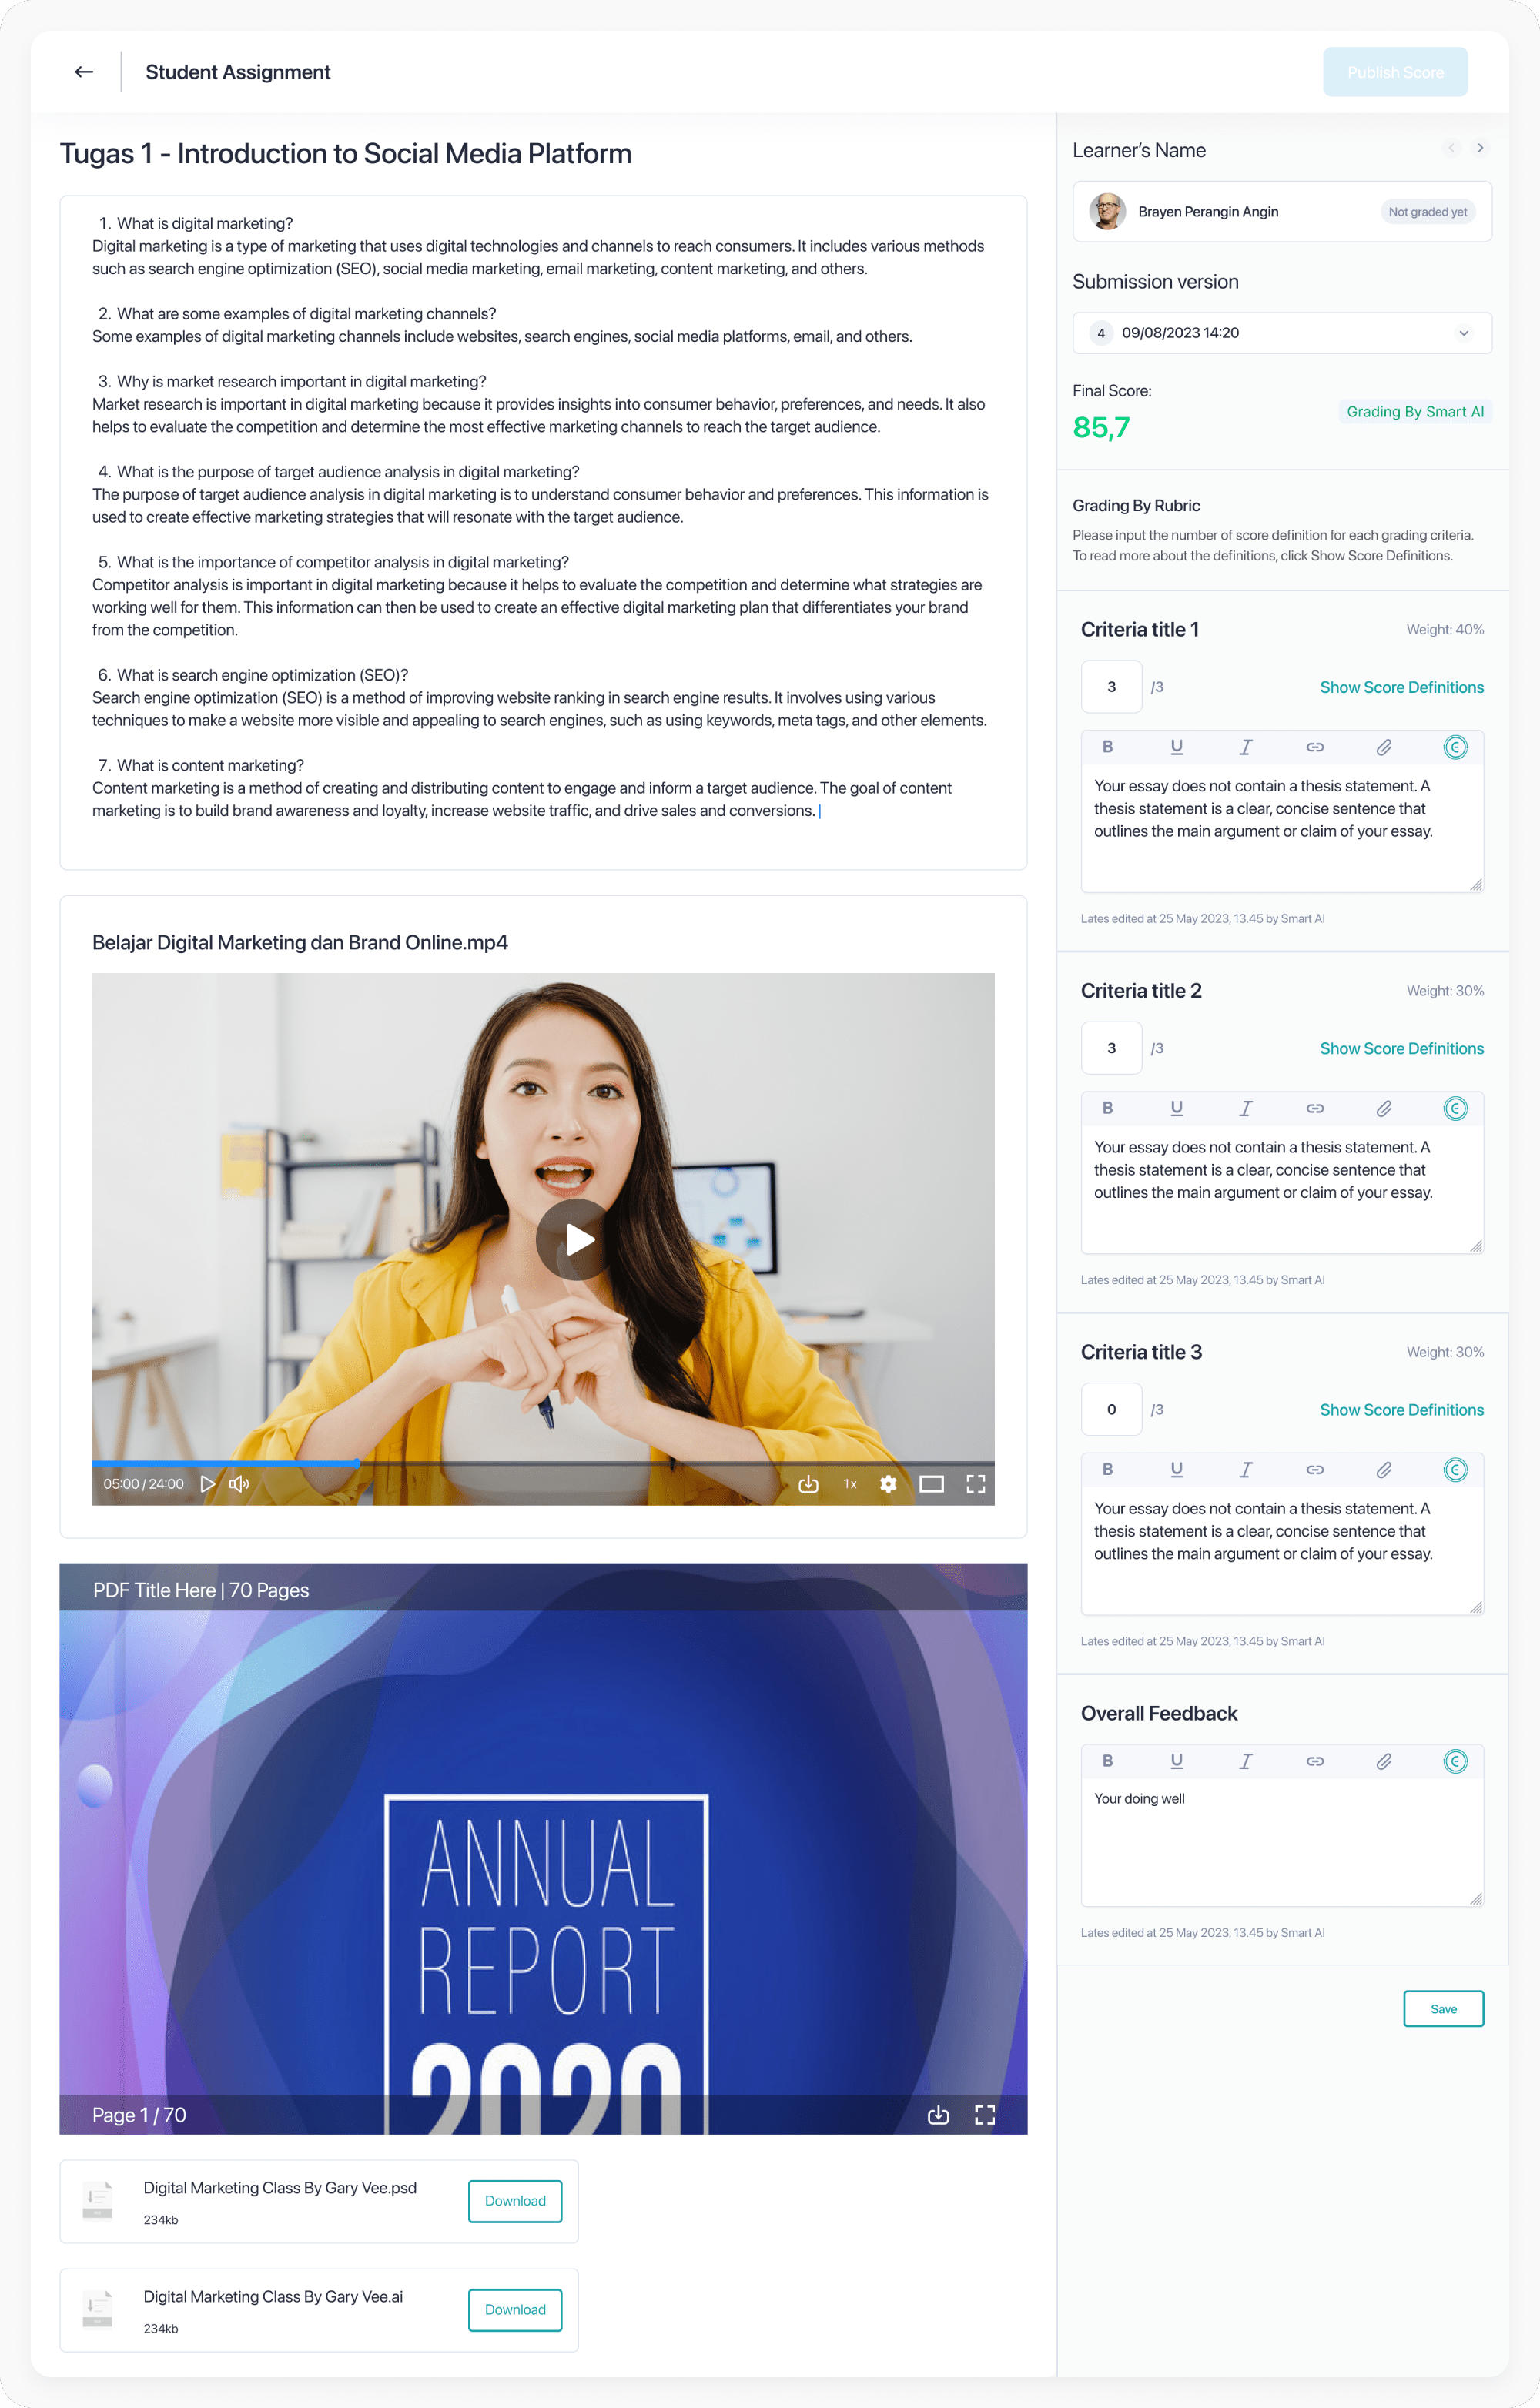
And, this is the Assignment Submission List page. Here, we can see the students enrolled in the course who are linked to this assignment. Each row shows important info like student name, submission status, how many times they retook the assignment, grading status, score, course name, submission date, and the educator who graded the work. There’s also a “View Assignment” button that opens the Assignment Preview & Grading Dashboard.

Here’s the Assignment Preview and Grading Dashboard where, in this case, the grading is done manually by the educator.
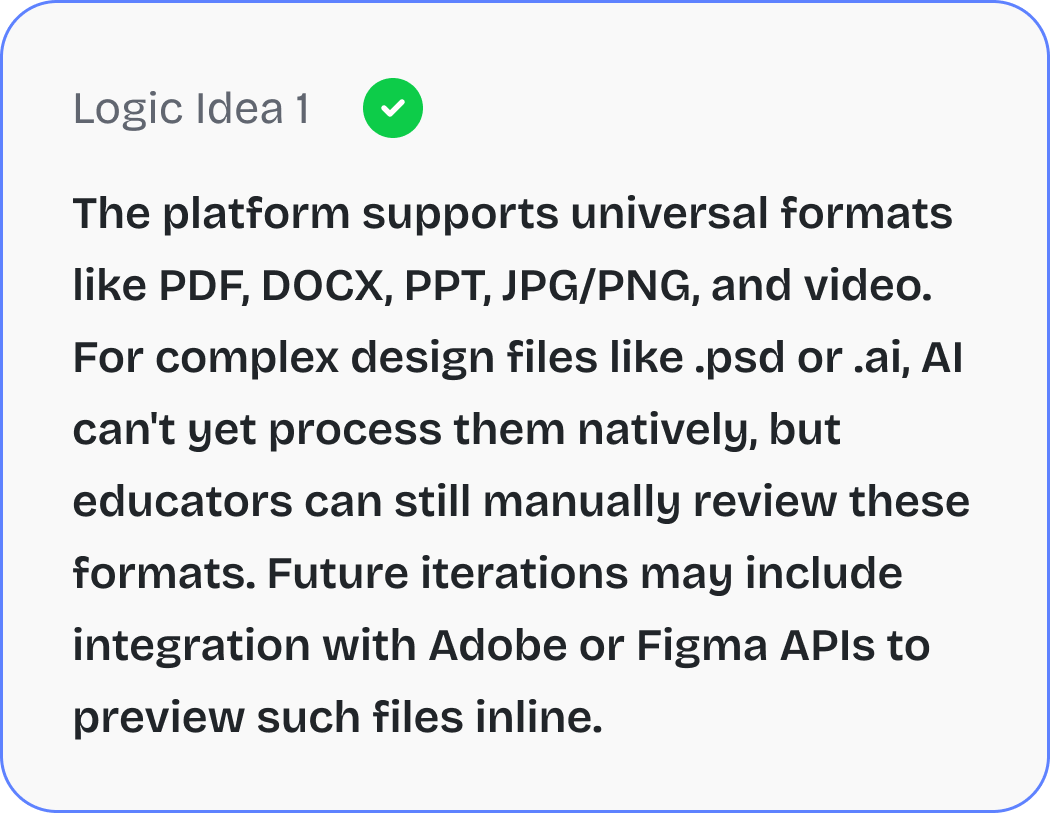
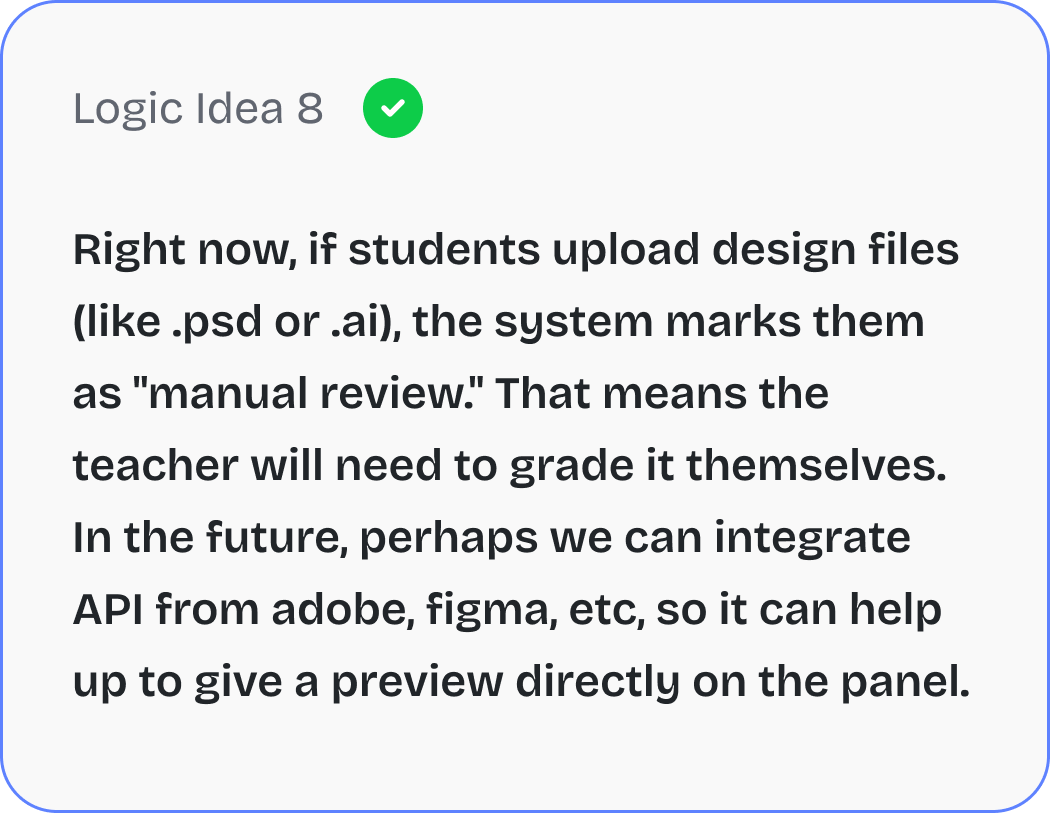
As an educator, I don’t just give a score and feedback, but I can also preview the student’s work in formats like DOCS, PDF, VIDEO, AUDIO, and PPTX (except for special formats like PSD, AI, FIG, etc.). If the Assignment Retake feature is turned on, I can also view the history of submissions. Plus, I can quickly switch between students using the dropdown without needing to go back to the Assignment Library or Assignment Details page.

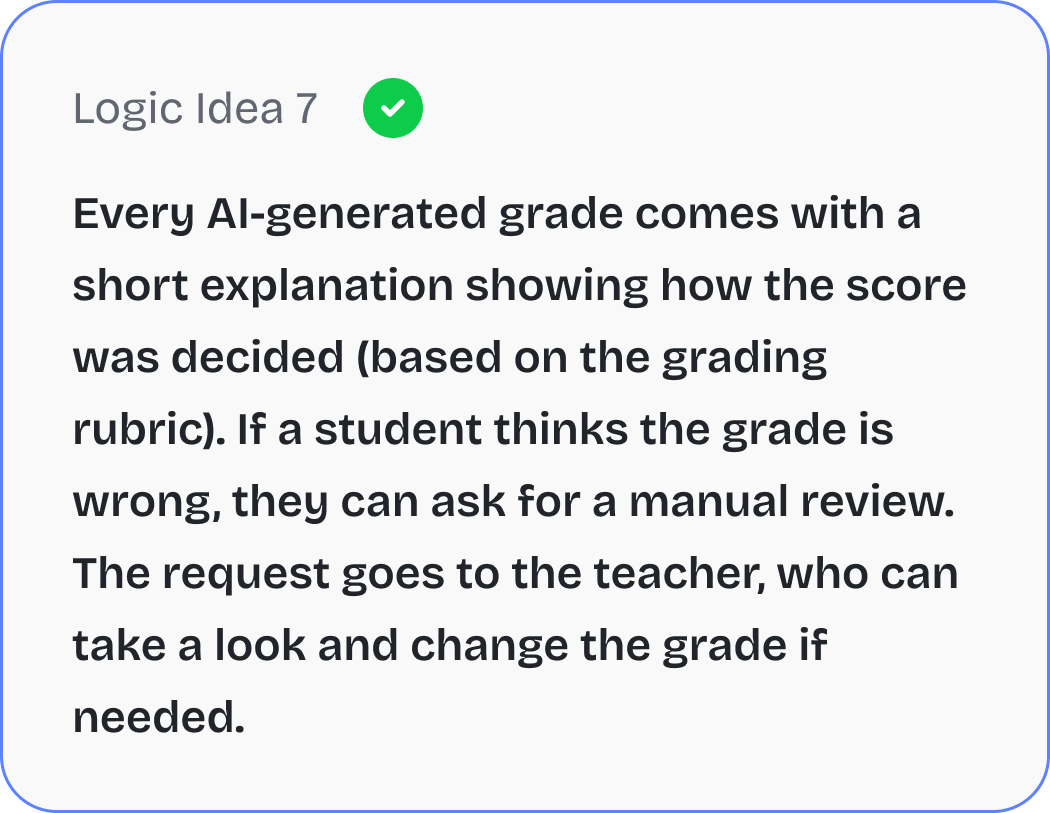
Next up, we have the Assignment Preview and Grading Dashboard powered by Smart AI. Here, AI automatically gives scores and feedback for each assignment. If I’m not happy with the feedback, I can regenerate it or even adjust the score manually. However, even though AI helps grade, I (the teacher) must still validate and save any changes first by clicking the save button. After that can I publish the grades back to the student. If I don’t save, the “Publish” button will stay disabled.

Now here’s another version: Grading by Smart AI but following a rubric system. Unlike the previous AI grading, in this mode, I can’t just freely edit the score because the grading strictly follows the rubric’s weighted criteria. If I want to adjust a student’s score, I have to change their rubric points instead. For example, if a rubric has 3 levels (1 = 0%, 2 = 50%, and 3 = 100%), and the AI gave the student a 2 (50%), but I think they deserve a higher score, I can change the point from 2 to 3.
Now, switching to the student's view, this is the Course Player page. It shows the full structure of the course material lesson by lesson. For this case, the course player is displaying an Assignment Lesson. On this page, students can see all assignment details like the description, the requirements, and any attached files if the educator enabled that feature from the Assignment Settings page.

Finally, this is the page where students can view their assignment results after being graded. Besides seeing their final score, they can also view extra details like the overall feedback, feedback for each rubric criteria (if the assignment uses a rubric), the original assignment question, and their submitted answer.

Working on the AI Assignment feature was a learning journey in so many ways. It was not just about designing screens or creating flows. It was about understanding how real educators work, what slows them down, and how AI could actually make a difference in their everyday teaching experience.
One of the biggest challenges was translating complex AI features into something simple and intuitive for users. It took a lot of trial, feedback, and reworking to get it right. Sometimes the technology was ready before we had the right experience to match it, so our job was to make everything feel clear and easy for users.
Personally, I learned the value of collaboration more than ever. From syncing with the head of product and tech leads to aligning with the UX writer and UI designer, it reminded me that good design does not happen in isolation. It happens through honest conversations, thoughtful feedback, and shared goals.
Building the AI Smart Assignment feature was more than just launching a new tool. It was about giving educators real, meaningful help where they need it most. Through AI-powered assignment generation, grading rubrics, and auto-feedback, we’ve made it easier for teachers to focus on teaching instead of spending hours on repetitive tasks.
Assignment Creation Time Reduced
Faster AI Grading Workflow
Early Educator Testers Satisfaction
AI Grading Feedback Accuracy
We saw these numbers as more than just metrics. They marked a real shift in how educators move through their daily work. What once took days now takes just hours. What used to feel slow and repetitive now feels smooth and intuitive.
For us, it was never just about making things faster. We wanted to make things smarter. With more accurate grading, clearer feedback, and easier ways to build assignments, we gave educators more time to focus on their students instead of getting stuck in admin work. And we know this is just the start. As we keep refining the system, our goal stays the same to help educators teach with ease and impact.
After building and rolling out the AI Smart Assignment feature, we have reached a meaningful milestone. The foundation is there, it is functional, tested, and being used. But meaningful product development does not stop at launch. It continues with learning, improving, and making sure the feature truly fits into educators’ lives in a valuable way.
Through this journey, we learned that educators appreciate the speed and consistency AI brings, but they also need clarity, flexibility, and trust in the system. It is not enough for the technology to be powerful, it has to feel personal, reliable, and empowering.
To keep building on this momentum and deliver even more value, here is what we are planning next:
Improve how AI decisions are explained. Add tooltips, previews, and helpful hints to build user trust and understanding, making the AI feel more like a partner than a mystery.
Extend the assignment feature to support group projects, creative tasks, and performance based assessments, expanding its impact beyond standard classroom tests.
Monitor how often AI tools are used, what features educators rely on most, and how confident they feel about grading with AI. Use these insights to guide future updates.
Look into developing instant feedback tools powered by AI so students can get guidance even before an educator reviews their work, making the system more interactive and student friendly.